These days, several of my best girlfriends (and guy-friends) are expecting their first babies, and so I have been trying to come up with baby gifts that I could make myself, and would also be handy and useful. But I found that my hand-made ideas kept getting too grand and out-of-control! I finally realised that I could manageably make and give something that I found incredibly handy and used every single day when I was a new mom: on-the-go baby change kits.
When I was a overwhelmed new mom, one of my best mama friends did me a huge favour and informed me that I really didn't need a diaper bag (or a hundred other baby essentials). She told me that when she headed out with her two kids, she would just throw a diaper, some wipes, and maybe a spare onesie in her regular shoulder bag. At the time, this really was a revelation to me! I never did buy a diaper bag, but I did end up making several little change kits.
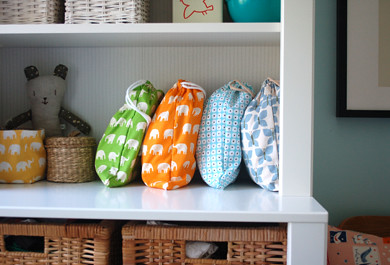
In each kit I could quickly and easily stow the items I would need while out with my little baby Adelaide : a spare diaper or two, some wipes, a change mat (love these ones: they are all we ever used, in or out of the house), and maybe a change of clothes. I would keep a few of these change kits handy and ready-to-go, and I could quickly grab one on the way out the door and toss it in whatever bag I happened to be using that day.

I used these kits pretty much every single day for several years, and I still do - but these days I keep one bag filled with snacks such as crackers, seaweed, an apple, and a drink bottle, and one filled activities such as a storybook, a child's note-book, stickers, and crayons. I rarely leave home with my daughter without them, and they really do happier afternoons out-and-about.

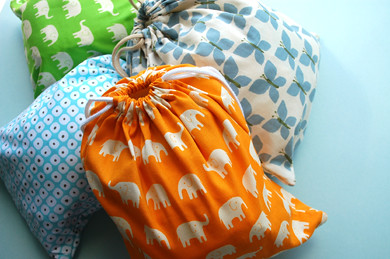
To make the on-the-go change kits, I followed my pattern for draw-string gift bags, but made a few minor variations: To make a 9 x 11.5" change kit, I used two pieces of 10"x13" fabric instead of one, folding, and pressing the bottom seam as the sides of the bags are also finished. I also ended up skipping step 2, and simply pinned the folded edges of two bags sides together and sewed them once this way. (If any clarification is needed: please just let me know!)
With no exposed seams, these bags have been designed to be long-wearing. and should last for many years. I often throw mine (made from 100% cotton) in the washing machine (gentle) and dryer (tumble dry low), and have found they hold up perfectly.

To give the gifts, I picked up some nice and sturdy wicker baskets and filled each with two baby change kits and a few other baby items that we've loved: a couple of wonderful board books, a bottle of our favourite baby bubble bath, and a small wooden toy. (I love wicker baskets such as these, as I find them wonderful, appealing, and so useful for storing baby supplies, children's toys, blocks, or art supplies in).

I then made up a little gift tag in adobe illustrator, explaining the kits and the idea behind them. I printed them out on my desktop printer on to this lovely heavyweight linen-canvas paper. When poking around looking for a way to attach the tags to the baskets, I was happy to discover that I could use a pushpin and tack it securely right to the basket. I happened to have many thumbtacks that I had glued vintage buttons onto a while back, and so I used them to attach the tags to the wicker baskets.
It is my hope that my new parent friends may find these little on-the-go change kits as handy and useful as I did. And perhaps someday you may make some up for your expecting friends, and they will find them handy and useful, too!


0 comments:
Post a Comment